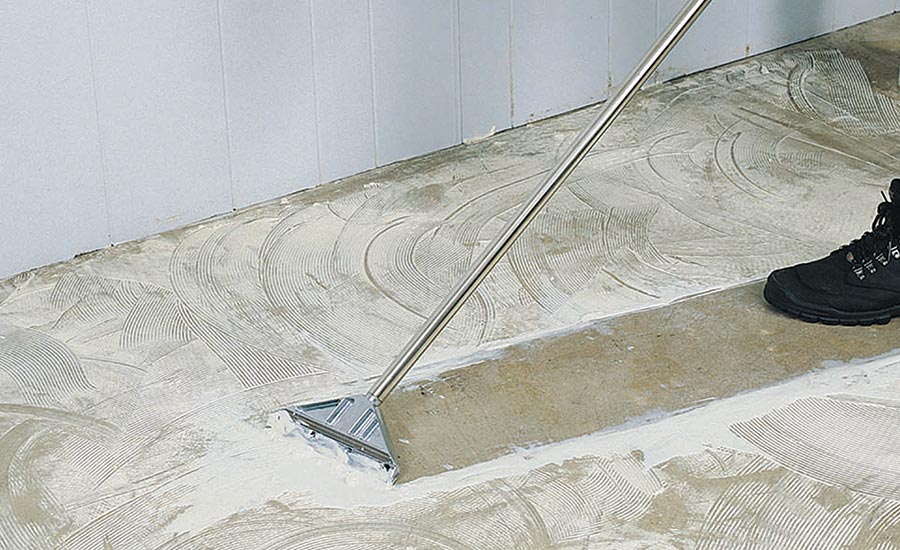
Removing floor tile adhesive can be quite a delicate task, requiring a methodical approach and the right tools at your disposal. Before you begin, it’s essential to understand the nature of the adhesive residue left behind. By knowing what you’re dealing with, you can effectively tackle the removal process. Also Read Manufacturers of Tile Adhesive, Wall Putty & Epoxy Grout .So, are you ready to uncover the steps needed to restore your floor to its former glory?
Assess the Adhesive Residue
- To determine the extent of adhesive residue left on the floor after removing tiles, inspect the surface carefully for any remaining sticky patches or remnants. Utilize assessing techniques such as running your hand along the floor to feel for any tackiness or using a flashlight at a low angle to spot shiny spots indicating leftover adhesive.
- Proper disposal of adhesive residue involves scraping off any excess adhesive with a putty knife or scraper. Be cautious not to damage the floor underneath. After scraping, apply a residue remover following the manufacturer’s instructions. Allow the remover to sit for the recommended time to dissolve the adhesive. Use a clean cloth to wipe away the residue. Repeat the process if necessary until the floor is adhesive-free.
- Remember to dispose of any removed adhesive in accordance with local regulations. By diligently assessing the adhesive residue and following proper disposal procedures, you can ensure a clean and smooth surface for any future flooring installation.

Gather the Necessary Tools
- Ensure you have the essential tools at hand before proceeding with the removal of floor tile adhesive. To start, prioritize safety precautions by equipping yourself with heavy-duty work gloves, safety goggles to protect your eyes from debris, and a dust mask to prevent inhalation of dust particles. Proper ventilation in the area is also crucial to ensure you’re working in a well-ventilated space.
- For the actual removal process, you’ll need a few key tools. A floor scraper or chisel will help you effectively chip away at the adhesive residue. A hammer can be used in conjunction with the scraper to aid in the removal process. Additionally, a heat gun or adhesive remover solvent can be useful in loosening stubborn adhesive, making it easier to scrape off.
Prepare the Work Area
- Prepare the work area by clearing out any furniture or obstacles that may impede your progress in removing the floor tile adhesive. Prioritize safety precautions by wearing protective gear such as gloves, goggles, and a mask to shield yourself from potential hazards like dust and sharp edges. Make sure the area is well-ventilated to prevent inhalation of fumes from any chemicals you may be using during the adhesive removal process.
- Additionally, take measures to protect the surface surrounding the tiles. Lay down a drop cloth or plastic sheeting to catch any debris or adhesive remnants, preventing them from damaging the floor or spreading to other areas. This will also make the cleanup process more manageable once you’ve finished removing the adhesive.
Apply Adhesive Removal Method
- Begin the process by selecting the appropriate adhesive removal method based on the type of adhesive and the flooring material. For adhesive that’s stubborn and difficult to remove, chemical solvents can be highly effective.
- These solvents work by breaking down the adhesive, making it easier to scrape off. Ensure proper ventilation when using chemical solvents and follow the manufacturer’s instructions carefully to avoid any accidents or damage to the flooring.
- On the other hand, mechanical scraping is a more labor-intensive but environmentally friendly method of adhesive removal. This method involves using tools such as a floor scraper, putty knife, or a heat gun to physically scrape off the adhesive from the floor surface.
- It’s crucial to work carefully to avoid damaging the subfloor or the flooring material while using this method. Whichever method you choose, always test a small, inconspicuous area first to ensure that it doesn’t cause any damage before proceeding with the full removal process.
Clean and Finish the Surface
- After successfully removing the floor tile adhesive using the chosen method, the next step is to meticulously clean and finish the surface to ensure a smooth and polished final result. Begin by evaluating the surface for any remaining adhesive residue. Run your hand across the area to detect any rough patches or sticky spots. If residue is present, use appropriate cleaning methods based on the type of adhesive. For water-based adhesives, warm soapy water and a scrubbing pad can be effective. Solvent-based adhesives may require mineral spirits or adhesive remover.
- Once the adhesive residue is completely removed, focus on surface preparation. Fill any gaps or holes with a suitable filler and allow it to dry thoroughly. Sand the surface lightly to create a smooth and level base for the new flooring. Finally, employ finishing techniques such as priming the surface before installing new tiles or applying a sealant for a polished look.
Conclusion
Overall, removing floor tile adhesive can be a challenging task, but with the right tools and techniques, it can be done effectively. By assessing the adhesive residue, gathering the necessary tools, preparing the work area, applying the removal method, and cleaning and finishing the surface, you can successfully remove the adhesive and prepare the floor for new tile installation. Remember to take your time and follow these steps carefully to achieve the best results.